Thursday, March 26, 2009

Lousy Updating Ameliorated

But, only in the worst possible way... with a survey!

The Very Good Taste Omnivore's 100 List

Rules:

1) Copy this list into your blog or journal, including these instructions.
2) Bold all the items you’ve eaten.
3) Cross out any items that you would never consider eating.
4) Optional extra: Post a comment at www.verygoodtaste.co.uk linking to your results.

1. Venison
2. Nettle tea
3. Huevos rancheros
4. Steak tartare
5. Crocodile
6. Black pudding
7. Cheese fondue
8. Carp
9. Borscht
10. Baba ghanoush
11. Calamari
12. Pho
13. PB&J sandwich
14. Aloo gobi
15. Hot dog from a street cart
16. Epoisses
17. Black truffle
18. Fruit wine made from something other than grapes
19. Steamed pork buns
20. Pistachio ice cream
21. Heirloom tomatoes
22. Fresh wild berries (well, they were in Gramma's backyard.. but weren't cultivated)
23. Foie gras
24. Rice and beans
25. Brawn, or head cheese
26. Raw Scotch Bonnet pepper
27. Dulce de leche
28. Oysters
29. Baklava
30. Bagna cauda
31. Wasabi peas
32. Clam chowder in a sourdough bowl (in both the Clam Chowder capital - Boston - and the sourdough capital - San Francisco... I'm so cultured!)
33. Salted lassi
34. Sauerkraut
35. Root beer float
36. Cognac with a fat cigar
37. Clotted cream tea
38. Vodka jelly/Jell-O
39. Gumbo
40. Oxtail
41. Curried goat
42. Whole insects
43. Phaal
44. Goat’s milk
45. Malt whisky from a bottle worth £60/$120 or more
46. Fugu
47. Chicken tikka masala
48. Eel
49. Krispy Kreme original glazed doughnut
50. Sea urchin
51. Prickly pear
52. Umeboshi
53. Abalone
54. Paneer
55. McDonald’s Big Mac Meal
56. Spaetzle (I did work on a play that mentioned this food.. doesn't count, does it?)
57. Dirty gin martini
58. Beer above 8% ABV
59. Poutine
60. Carob chips
61. S’mores
62. Sweetbreads
63. Kaolin (isn't this a type of clay?)
64. Currywurst
65. Durian
66. Frogs’ legs
67. Beignets, churros, elephant ears or funnel cake
68. Haggis
69. Fried plantain
70. Chitterlings, or andouillette
71. Gazpacho
72. Caviar and blini
73. Louche absinthe
74. Gjetost, or brunost
75. Roadkill
76. Baijiu
77. Hostess Fruit Pie
78. Snail
79. Lapsang souchong
80. Bellini
81. Tom yum
82. Eggs Benedict
83. Pocky
84. Tasting menu at a three-Michelin-star restaurant
85. Kobe beef
86. Hare
87. Goulash
88. Flowers
89. Horse
90. Criollo chocolate
91. Spam
92. Soft shell crab
93. Rose harissa
94. Catfish
95. Mole poblano
96. Bagel and lox
97. Lobster Thermidor
98. Polenta
99. Jamaican Blue Mountain coffee
100. Snake

35/100... I think I've only ever scored that low on tests in geometry class! Clearly, I need to expand some of my food horizons, though I am happy to say I've never eaten a Big Mac meal.

Expect some more on-target posts in the near future.

Thursday, January 15, 2009

Making Butter

Though they may seem intimidating, making your own dairy products is frequently not that difficult. Some recipes may take a while: yogurt requires about half an hour of heating and cooling the milk before letting it sit for 8-12 hours, but it's certainly not hard. Same with soft cheeses: heat and cool milk or cream, strain, maybe add another ingredient (like vinegar or lemon juice) and wait. Butter, on the other hand, is a more... active recipe.
Instead of heating and waiting, butter is a totally raw food.
Also unlike yogurt and cheese, butter is a good workout.

Step 1: get some heavy cream (I used raw from the farmers' market and I highly recommend it)
Step 2: put it in a container with a good seal (I used a lock-n-lock container)

Almost there in this picture
Step 3: SHAKE!

Basically, you first make whipped cream. When you continue shaking after the whipped cream, the cream gets thicker and then breaks down. Continued shaking results in butter and a special splash: buttermilk!
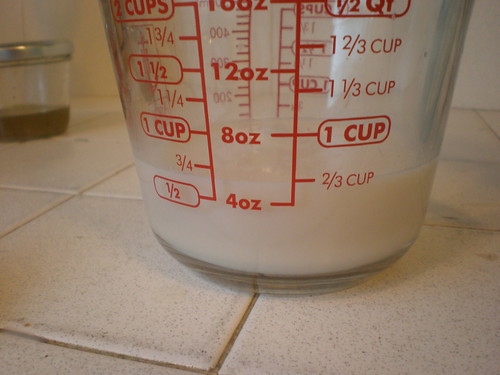
I didn't get quite as much buttermilk as I expected, but I was ok with that. My recipe called for 1 cup of buttermilk, but I was able to make up for the lack by mixing some leftover cream with water and a squeeze of lemon juice. Ideally, 1 pint of cream, like I had, should yield 1 cup of butter and 1 cup of buttermilk, but I think I got the better part of the deal -- extra butter!After the butter has clumped up, drain off the buttermilk. As you can see, I saved it in a measuring cup and carefully refrained from guzzling it myself, but you might not have the same glorious willpower. You're not done just yet, though.

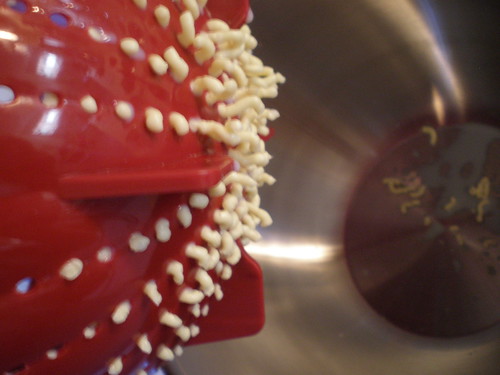
Throw your butter into a bowl and pour in some water. Knead the butter and dump out the water. Continue this process until the water is clear. Why? You're rinsing off excess buttermilk. If you were to leave it on there, the butter would go off much more rapidly and you'd be left with nasty rancid butter. For my rinsing step, I actually used a colander, but it was a lousy choice, as the picture below demonstrates.

Overall, making butter is easy, sort of fun, and definitely quite an experience. Probably a good science experiment for children, but I don't know the actual science behind the cream to butter process, so I probably won't be using it as a lesson any time soon. Do you know the science behind butter? I've got an interview for Teach for America coming up, and I could use a great mini-lesson. Props are encouraged and I'm sure they wouldn't turn up their noses at some butter time.

Monday, January 12, 2009

Pizza Party

Earlier this week, a good friend of mine emailed to see if I'd be interested in a weekend pizza party. Transcript of his email: wanna have a pizza party on saturday? ive been experimenting with goat cheese.
My response: [...] I'll make the dough if you bring the cheese!
Clearly, we are a delightful group. So, friend sent out a mass email to other friends and, as the week wore on, said friends grew more and more excited about homemade pizza.

Well, tonight, all our pizza dreams came true, with a few mishaps thrown in for fun.
I spent the day at the farmers' market, church, and CostCo, so I actually had very little time at home. I'd started a poolish with one of Peter Reinhart's to-die-for recipes, but later realized the dough needed yet another day of refrigeration to make it take on full flavor. As I am not willing to waste poolish that's been squandering space in my fridge for a full night, I went with a completely fresh dough, ignoring the pre-ferment pain. And where did I find this delightful dough? No other location than my darlingest food blog, Smitten Kitchen. I found this amazingly simple dough recipe and planned on making it a few hours before the party for a richly risen dough treasure. Of course, I had no flour, so an emergency grocery run and a few distractions later, the party was just getting underway and I was just beginning my dough mixing.

I enlisted a slightly unwilling Boy, and we whipped up this dough (three batches in, oh, maybe 10 minutes), swaddled them in plastic wrap, and shoved them into our goodie bag to head to the pizza party.
We let the dough rise a bit on top of the oven, then the baker-boys took over, stretching, nay, throwing my dough into perfect circles then dressing them from a gorgeous assortment of condiments, from pesto to carmelized onions and back around to raw mushrooms (fresh from this morning's farmers' market) and Kalamata olives. If I remember correctly, we made a total of 7 pizzas, 3 with my dough and 4 with miscellaneous donations from Trader Joe's and another friend's CuisinArt. By far, my dough got the most applause, and that for dough hurriedly whipped up and not even allowed to fully rise . Clearly, this is a spectacular recipe. Allow me to share!
That's pizza in that pan there -- we made many types and shared!

Spectacular Pizza Dough
adapted from Smitten Kitchen
Makes one 12" pizza
  • 1 1/2 cups unbleached all-purpose flour (organic if possible, part whole wheat, if you're adventurous. I used only all-purpose this time, though I'll likely sub part whole wheat next time)
  • 1 tsp salt
  • 3/4 tsp active dry yeast (if using other yeast types, adjust accordingly)
  • 1/2 cup lukewarm water (give or take a few drops)
  • 1 Tbsp olive oil
  1. In a large-ish bowl, throw all the dry ingredients, even the yeast, together. Stir them up and then add the water and olive oil. Mix the ingredients together, but don't sweat it if they're stubborn.
  2. Dump the bowl's contents onto a lightly floured counter/workspace and gently knead until the dough forms nicely, about 1-2 minutes. All the extra floury bits should come together at this stage to leave you with a smooth dough.
  3. Lightly (lightly!) oil the bowl and put the dough ball into it, turning to coat evenly. Cover the bowl in plastic wrap. OR Lightly oil some plastic wrap and wrap the dough ball into it.
  4. Let the dough sit for an hour or so until it's risen, then stretch out, place on cornmeal-dusted parchment paper, and top with delicious everythings.
  5. Transfer the parchment paper to the oven, preferably onto a warmed pizza stone, but a cookie sheet works ok and bake on your oven's highest temperature until the cheese is melted and the crust is wonderfully brownish.


Friday, January 9, 2009

Regional Food Affairs

Occasionally, everyone has affairs. I figure, if Bill Clinton can, why can't I?
Thus, my regional food affair.
Not only am I in love with the food of my countrymen (that's the Pennsylvania Dutch, famous for pot pie and scrapple, and Italians, famous for all good food, everywhere), but I also love the food of other regions, like wherever Brie comes from (I know it's France!) and Mexico (mmm, tortillas!).
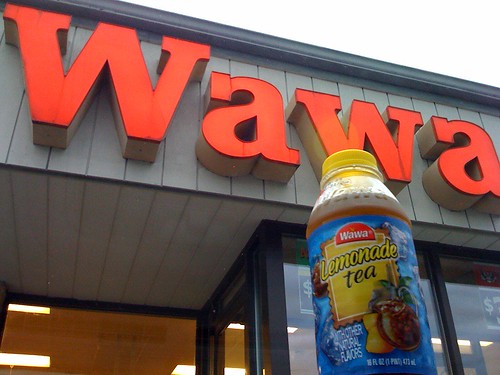
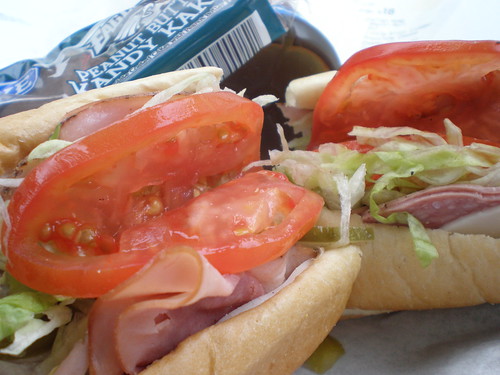
Mostly, though, I love food from home, wherever home may be. TheBoy made a particularly apt statement while we visited family for the holidays "back east." He mentioned that we are now so firmly citizens of both the east and west coasts that we can be those annoying jerks who crave foods "from home" no matter where we are. In PA, we sorely missed our beloved In-N-Out, but here in Cali, I can't even begin to tell you how much we miss good pizza, hoagies, cheesesteaks, and, above all, Wawa. ::sigh:: My stomach growls even thinking about all the delicious Amoroso rolls, salami, provolone, capicolla, and vinegar. ::sigh again:: So, when we visited, we stopped by all the best places to get a taste of home. First stop, Wawa, of course!

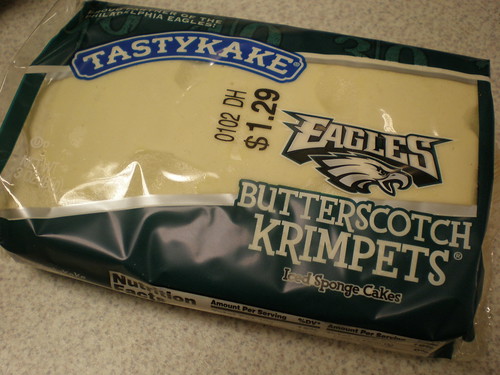
We got the full meal: lemonade iced tea, an Italian hoagie with oil, vinegar, and all the veggies, and TASTYKAKES. We hesitated between visions of butterscotch crimpets and kandykakes, but had to stick with the latter. Why? Because they had the EAGLES on them!
Only later did we find crimpets with Eagles logos, too. Wow!
Later, we went to Pepper Mill (you who don't know.. I'm sorry) and I got a cheese steak while TheBoy got an Italian grinder. There are no pictures for the same reason there are no leftovers -- too good! Even better about our Pepper Mill trip: a good friend of mine works there and when we "complained" about the food, he gave us a full refund. *wink*


Despite the fact that I love Wawa and everything it serves, I have to carefully balance my cravings with the realization that almost everything that Wawa serves is totally unhealthy, unsustainable, and not always all that tasty. Yes, I am talking about Wawa coffee. Ew.

What I do love, though, is how food becomes such a vital part of a place. I couldn't imagine the Greater Philadelphia area without Wawa or cheesesteaks, just as I couldn't picture Los Angeles without In-N-Out and taco trucks. The feeling of community is irreplaceable.
What food is vital to your region? Share in comments!

Monday, January 5, 2009

Holiday Food Treats

I hope everyone just had a lovely set of holidays. Around here, we celebrated entirely too much and, well, the cookies were basically endless (future posts about them.. .yeah). How about I ease into the new year, though, and highlight some food/foodie things received.

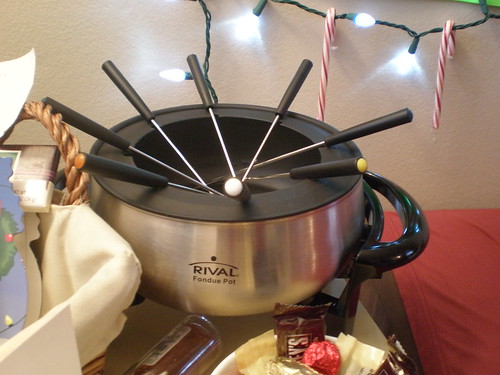
TheBoy's gift to me was both thoroughly unexpected and wonderful. A FONDUE POT! Now, I will have to become Strongbad in order to lend out my newly prized possession. I imagine my next encounter will somewhat resemble this Homestarrunner cartoon.

One of my very best friends (who happens to be one of my bridesmaids) gave me a delightfully food-filled gift. Now only did she handcraft a delightful pair of onigiri earrings, but she also delivered some intensely sweet powdered ginger drink. She knows of my great love for ginger, and decided to conveniently deliver. This friend, A, then accompanied TheBoy and me to the craft store for some fun times -- A is an artist (chemical engineering major--artist) and I needed some new yarn to satisfy my cravings. While we were there, A decided that she had not delivered a fully spectacular Christmas gift, so proceeded to purchase two packs of Wilton's adorable mini cookie cutters, one in the "romance" theme and one "Noah's ark" theme. Obviously, A knows me too well. In fact, A is the wonderful roommate who first introduced me to bento, mini cookie cutters, and all things tiny, precious, and edible.

There was only one negative to A's fabulous food contributions: that honey ginger drink is entirely too sweet. Like, mouth-curdlingly sweet. So, how did I remedy this situation? Well, I'm adjusting how much of an individual packet I put into my cup of hot water. Unfortunately, the packets are not resealable and I actually really hate cutting open individual packets. So, this morning I took the only logical step to correct this issue: I cut all the packets opened and dumped them into an infrequently used Nalgene bottle. Now, I will be able to use a long-handled spoon to easily pull out just exactly the right amount of ginger powder without wasting half a packet or having to pull out the scissor. A, are you proud of my food engineering?

Do you have any interesting ways of storing powders or correcting for flavor imbalances? Share in comments!

Tuesday, December 23, 2008

Holiday Lunches, Again


Over here in LaLaLand, we're all gearing up for holiday hiatus and you know what that means, right? Minimal updates!

Instead of leaving you totally bereft over the holiday season, though, I thought I'd treat you to a second dose of festive food.

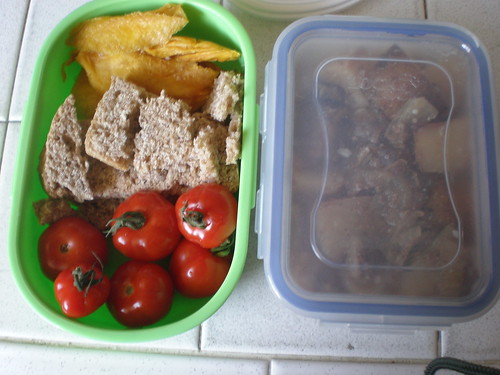
Here we have my accidentally festive lunch from December 18th. I justsohappened to use a green box and those wonderful farmers' market-found cherry tomatoes couldn't help but cheer up my lunch. The less exhilarating companion to the green box is a microwavable Lock-N-Lock container filled with the same leftover beef stew we've been suffering from (actually, it's delightful, but I'm glad to see it gone). Inside the green box are some of those tomatoes, some small bite-size chunks of homemade bread, and some unsweetened dried mango slices from the bulk bin -- pretty healthy and awesome, in my opinion. If you notice that I packed the green box pretty lightly, you're right: together, the Lock-N-Lock plus the green sidecar is entirely too much lunch for me, so a mostly filled beef stew and lightly packed side are the perfect amount for a filling, wintertime meal, especially in our arctic office environment. Frigid!

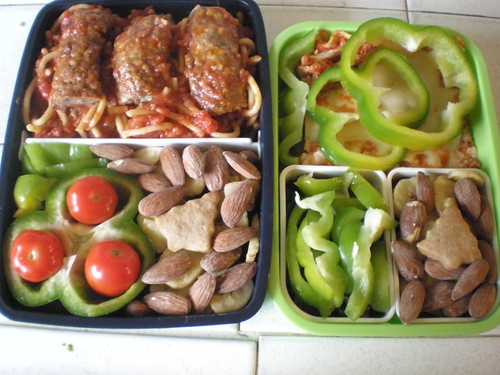
Though the last meal was accidentally holiday-themed, this next bento set was purposefully crafted as a tribute to our Christmas spirit. Taking some of the spicy shortbread cookies that I made and coupling them with leftover spaghetti with sausage, and happy green peppers was a great start. Throwing those delightful cherry tomatoes completed the package in the best way. For TheBoy's lunch, I simply cut slices off the top of a green bell pepper and set them aside. I sliced until the bottom of the pepper was shallow enough to sit in his lunchbox. You can see some of the extra slices plugging a hole next to the "wreath" pepper and, of course, over in my box, covering my leftover lasagna. He also got a layered snack area filled with banana chips, salted almonds, and a single spiced shortbread cookie -- I got the same, just with smaller portions.

TheBoy loved how much thought (he thinks) I put into this lunch and gobbled it up in record time. He loves anything to do with spaghetti and tomatoes and peppers, so this was a huge hit. I also loved my lunch and we both got compliments on our wonderful meals. So, I'll sign off now for the holidays with a clear blog-conscience. Happy Holidays, everyone!

Wednesday, December 17, 2008

Festive Food

Because L.A. is so different from my old, cold Christmas home, I've been having some difficulty getting ready for the holidays. So, to help me, I've started making festive food choices. Beginning with my holiday cookie spree and edging into our lunches, Christmas has started to seriously invade the kitchen here.
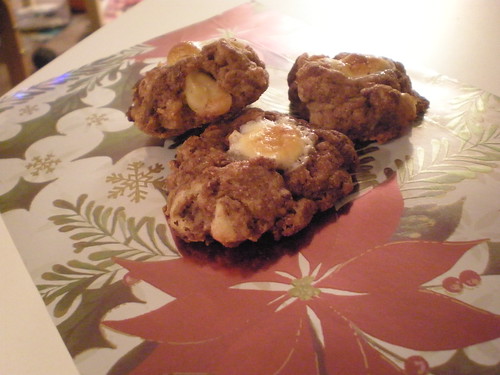
Let's start with a small example: Saturday night hit and cookie craving set in bigtime. I needed my fix, so I made another batch of Chocolate Rocky Road cookies. These ones didn't turn out quite so beautifully as the last ones, but were delightful, especially when photographed on holiday wrapping paper!

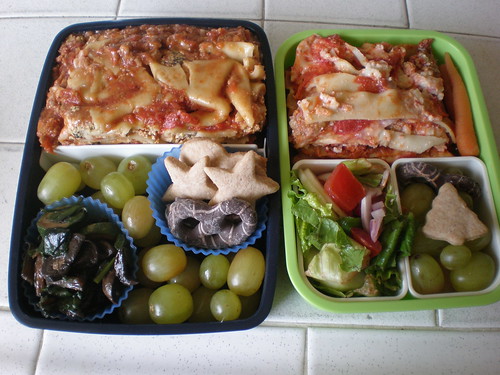
A little bit of red and green has snuck into our lunch boxes in the form of lasagna and green grapes. Let me tell you a bit about the lasagna. First, I started by making the sauce. You can find the recipe at the bottom of the post, but mostly it's a sham-recipe -- I just throw in whatever I have around. While the sauce is bubbling away, I work on the ricotta (following the directions on the lasagna noodles box... too easy!). While both the sauce and ricotta are getting delicious, I'm also, sometimes, heating up hot Italian sausage to mix into the sauce. Then, it's just a matter of throwing all those ingredients into the baking dish and making delicious, holiday lunches with the resulting leftovers. The other defining holiday aspect of these lunches are my Christmas cookies. A recent post dealt with the cookies, so I won't go into too much detail, but... they are pretty festive, aren't they?

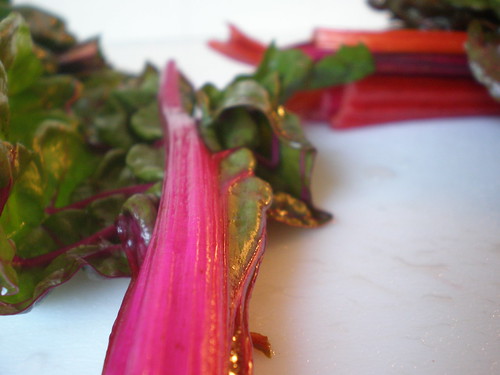
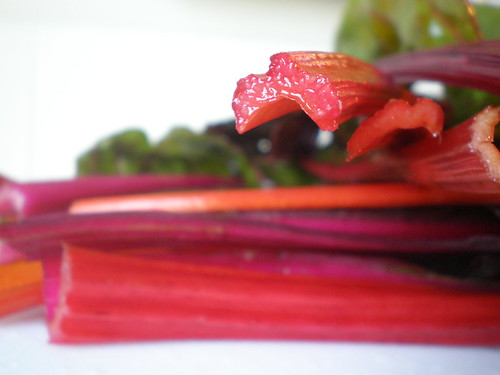
How about the naturally red and green produce from our local farmers' market? Swiss red chard is big in my book, I've even blogged about it before. I love how it looks, smells... I even love how it feels. I took some of that fabulous vegetable and cooked it up into a sort of Mediterranean stir fry: Swiss red chard, zucchini, mushrooms, and, of course, garlic and olive oil combined to make MMM the best stir fry I could whip up. And plenty of leftovers for the next week. It's even in the red and green bento pictured in this post.

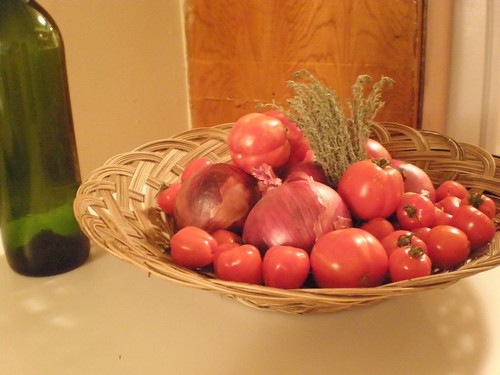
Chard was not the only festive farmers' find this week. I got tons of great red and green produce there. Take a look at our veggie basket, brimful of bright red heirloom tomatoes, pretty purple onions, and, best of all, a subtly colored and heavenly smelling bunch of thyme. I can't wait to use it in the Parmesan-Thyme Savory cookie recipe I have stored up in my recipe file. This image of our produce basket even has my "rolling pin" off to the side. You can read about my wine bottle rolling pin reuse project over at my eco blog, Light Up My Room.


Homemade Sauce Recipe

  • 1 huge can (smaller than a basketball, bigger than a softball) of stewed tomatoes
  • 1 Tbsp. tomato paste (for thickening. give or take for taste and preferred thickness)
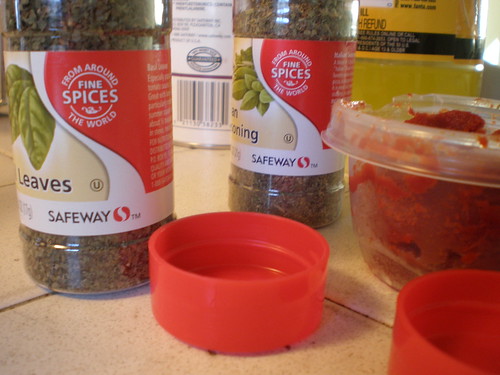
  • 1 Tbsp. fresh, or 1 tsp. dried, basil leaves (or to taste)
  • 1 Tbsp. fresh, or 1 tsp. dried, Italian herbs (I use a dried blend, but you can use parsley, sage, oregano.. whatever)
  • 1-6 cloves garlic, minced (have I mentioned we LOVE garlic?)
  • Olive oil for the pan
  • Salt and pepper to taste
1. Heat olive oil in a tall-sided pot and add garlic. Don't let the garlic brown, just get your kitchen smelling delicious.
2. Add the stewed tomatoes, crushing each one with your hands (OVER the pot! or else you'll make a huge mess!). Crush or cut to your preferred texture; I like chunky sauce. TheBoy calls it "stylish"
3. Add spices and stir well.
4. Let it cook until the tomatoes have started falling apart and the taste is to your standards. It's really up to you how this sauce turns out. If you decide to add meat, especially sausage, make sure you either buy loose ground meat or crumble it up before browning, because it's a hassle if you try to crumble after cooking.

Friday, December 12, 2008

Recipes with Molasses: Cookies


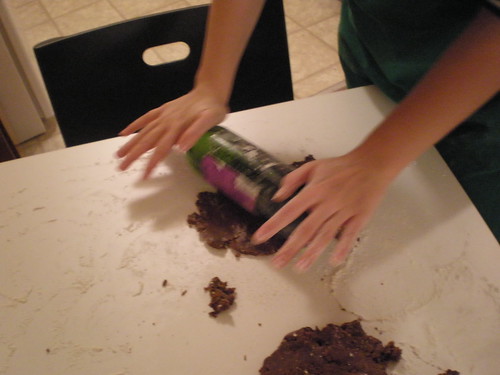
Imagine Wednesday of Thanksgiving week: the dough is already whipped up and chilling in the fridge. (After much searching for the appropriate recipe, I went with the one on the molasses bottle... find it at the bottom of the post). TheBoy and I went out to find a rolling pin to tame the dough and... no place had one! Well, Target had one for $20, but I couldn't see myself buying a stick with handles for that much money. One extremely unpleasant (though productive) Wal-Mart visit, later, we were ready to head back to Target to pick up that over-priced pin.

Well, there must have been a serious run on rolling pins because there were no absurdly expensive cooking implements left. At all! Commence calling: I called TheBoy's mother (future Mother-in-Law of yours truly) and asked if I could use her rolling pin and oven at Thanksgiving (she said yes, but I was able to avoid that fate, anyway) and TheBoy called our wonderful friend J----- for his help. J----- suggested a floured wine bottle and, voila!, we had our answer. We rushed home to the already-opened bottle of FishEye and TheBoy chugged it down (my Tylenol-cured headache prevented me from joining him) so that I could fill it with cold water, which both added heft to the pin and kept the dough extra cold so I could work with it longer.
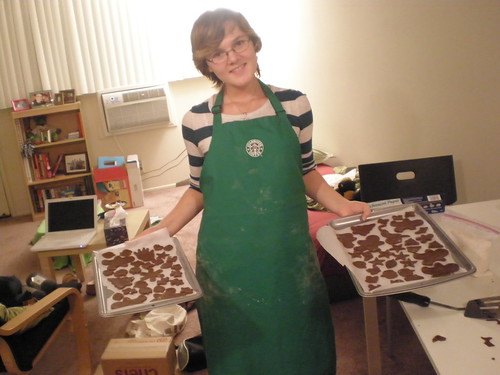
Overall verdict: I will likely NEVER buy a rolling pin, I'll just drink more and more Merlot to sustain my baking habit. The cookies turned out delicious (if I do say so myself) and everyone ate them right away.

Gingerbread Cookie Recipe
makes uncounted dozens of mini cookies (probably about a gallon, if you must know)
  • 3/4 cup molasses, light or dark (I used dark)
  • 3/4 cup margarine or butter (I used butter)
  • 3/4 cup brown sugar, firmly packed
  • 3 2/3 cups all-purpose flour
  • 1 Tbsp. ground ginger
  • 2 tsp. ground cinnamon
  • 1 tsp. baking powder
  • 1/2 tsp. baking soda
  • 1/2 tsp. ground nutmeg
  • 1 egg

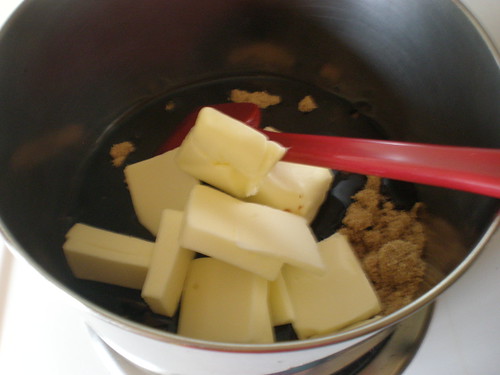
1. In a saucepan, heat the molasses, butter, and brown sugar until the mixture boils, stirring occasionally. Remove from heat, cool.
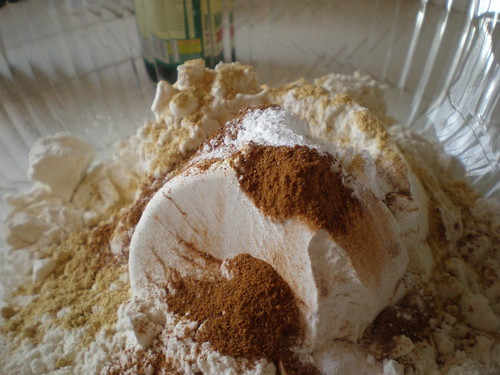
2. In a large bowl, mix all the dry ingredients.
3. Stir egg into molasses mixture and mix together the flour and molasses mixtures.
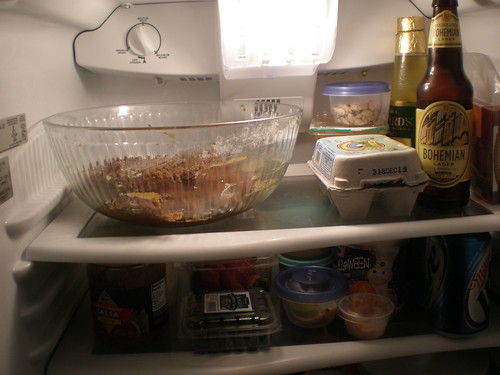
4. Put the dough into the fridge (I left it in the bowl, but you might want to wrap it in plastic wrap) for 1 hour or more.
5. Divide dough in half. On a floured surface, roll the dough out to a thickness of 1/8 to 1/4 inch. Use floured cookie cutters to make precious little shapes (I used everything from a mini gingerbread man to a lion).
6. Bake at 350 F for 6-14 minutes, shorter for softer cookies.
7. Remove from pan to cool on a wire rack. Store in an airtight container for up to 2 weeks.

Monday, December 8, 2008

Recipes with Molasses: Bread

Well, I made two over-long posts both featuring molasses-heavy recipes... so how about a single over-long molasses post! On better thought, how about a two-part series?


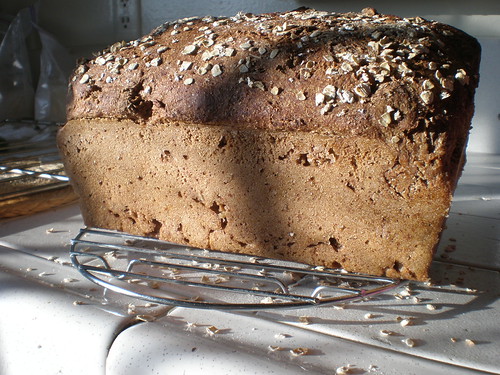
As for the Honey Molasses Whole Wheat Bread, this yeast bread was really really easy and bakes to be ENORMOUS. I was terrified of using yeast... so I stuck to beer bread. But now.. mauahahah! No yeast bread is safe from my kneading and mixing.

I had a wonderful time making this bread. Because I was making it for a special occasion, where more than just TheBoy would suffer if I created a lousy product, I was particularly careful to follow the directions. I measured things precisely and didn't stray from the recipe at all! Let me tell you -- it was a crazy experience. But, my diligence definitely paid off. We came home with only scraps and our host was more than delighted to keep the rest.
My little bread pan was overwhelmed with flavor and expansion. I've always stayed away from bread-baking in the past to avoid the hassles of yeast and the troublesome rising, kneading, and patience required, but this loaf was a pleasure to make: no kneading and only very minimal time to rise. I was really impressed with this easy bread and I will definitely be making (and blogging about) more loaves in the future. Do you have any favorite yeast bread recipes? Please share in comments!


Easy Honey Molasses Whole Wheat Bread Recipe
makes 1 loaf
Recipe shamelessly lifted from ZestyCook. Thanks!

  • 2 Tsp. honey
  • 2 2/3 Cup lukewarm water
  • 4 tsp. dry yeast
  • 3 Tbsp. Molasses
  • 5 Cups whole wheat flour
  • 1/2 tsp. salt
  • 1/4 Cup wheat germ (you can forego the wheat germ, but it's so useful that I splurged)
  • 1 Tbsp. Oatmeal (for optional decoration)
  1. Preheat oven to 400 Degrees F.
  2. Stir 2 teaspoons honey into 2/3 cup lukewarm water and sprinkle yeast over the mixture. Set aside for 10 minutes.
  3. Combine 3 tablespoons molasses with 2/3 cup warm water and combine with yeast mixture.
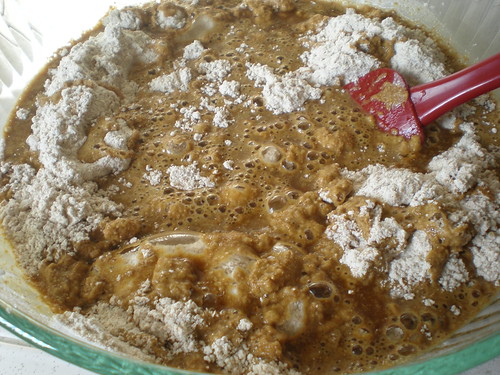
  4. Stir the mixture into the flour. Add salt, wheat germ and 1 1/3 cups warm water. Dough will be sticky. (I mixed all the dry ingredients first)
  5. Pour the dough into a loaf pan -- I grease just the bottom of mine and everything comes out great. Don't grease the sides!
  6. Smooth the top of the loaf with a wet spatula and sprinkle on the oatmeal, if you choose to.
  7. Let the dough rise to the top of the pan, then stick that baby in the oven for 30-40 minutes. The bread will rise like crazy. I had to take the top rack out of the oven to prevent the bread from baking into it.
  8. Cool the bread - in the pan - on a wire rack for 10 minutes, then turn your bread loose into the world. Let it cool down some more (if you can stand to wait!) before slicing into it and devouring every last wholesome morsel.

Monday, December 1, 2008

Thanksgiving Kitchen Adventures

What exactly did I make over Thanksgiving? Well, to the first Thanksgiving celebration, I brought my now-famous cornbread casserole (extremely simple recipe at bottom), gingerbread cookies, and guacamole + tortilla chips. The future MIL was very pleased with my offerings (^_^) and all the guests loved them, too.
For the second Thanksgiving (on Saturday), I brought the same cornbread casserole (not leftovers, 'cause there weren't any), gingerbread cookies (leftover because I made so freakin' many), guacamole + tortilla chips, cranberry sauce (with ginger and orange; recipe at bottom) and two loaves of bread: beer bread and super easy Honey Molasses Whole Wheat bread (recipes in future post... ahah! now you have to continue reading into the future!). We came home with almost none of the food we brought, but super full and delighted to have spent such a lovely time with friends. I posted a recipe for and wrote about the guac in my World AIDS Day post. Find the molasses bread in a future post about molasses-based recipes.

I was thrilled to have the opportunity to show off my new bread-making skillz. The beer bread is toooo easy and I love that you can add all manner of extras, even though I kept this loaf simple. I'm sure I'll get a little more adventurous with it soon. Despite how easy this bread is, I really messed up my first try at it. Originally, I had thought to make a beer loaf because I had a whole fridge full of almost unpalatable Miller Lite (failed Halloween party, anyone?). Using cheap-o beer, though, didn't really work out as well as using a better beer, so I ended up finding a pretty reasonable lager at Trader Joe's.
Of course, the first, Miller Lite loaf may have failed because I stirred the batter for too long. What happened was I used a small bowl, not the enormous one that I really should have used for mixing up bread. Because the bowl was so small, I had to overstir the batter to get to all the hidden flour deposits. Also, I think months-old Miller Lite maybe loses a little carbonation. Or, maybe that's why it's "less filling" ... because it's less able to rise my bread!

In any case, the loaf I made for SaturGiving turned out great! I was more than pleased with the feel of the loaf and, more importantly, everyone else at the party really enjoyed the flavor and texture. This is a really moist bread and tastes great slathered in holiday leftovers. I'm really super-excited about bread-baking, now. Look for more bread in the future!

Now bread wasn't the only new item on my cooking agenda. Cranberry sauce was a really interesting avenue for me to explore. The future MIL actually requested that I not bring my own cranberry sauce to her Thanksgiving because she wanted to try her hand at it, first. Her sauce was great -- very tart and tasted fantastic on the turkey! So, what did I do? Totally stole her recipe inspiration.
My future MIL is a great lady, but I wouldn't call her exactly adventurous. She tends to find a recipe, maybe tweak it a bit, and turn out a fantastic meal. I am a big-time food explorer, though. Now, I won't buy that $15 package of Thyme when I have nameless-random-spice-of-the-day at home. So, I took the basic cranberry sauce recipe, and combined it with several other sauce recipes to make, what I think, is a superb, fascinating rendition of traditional cranberry sauce.
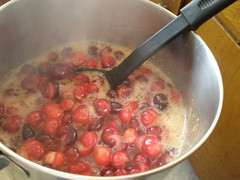
Well, all cranberry sauce begins with 1 cup each of water and sugar along with a package of cranberries, easy enough. So, I stuck those into the saucepan to get started and then went to town! I peeled a good-size ginger root and just grated the heck out of it, right over the boiling, frothing cranberry deathpit brewing in my saucepan. Then, I got out a great-big orange and zested it to death. All the zest from an orange the size of both of my fists went into my sauce. Admittedly, I have tiny hands, so both fists is still reasonably sized for a citrus fruit. Of course, I couldn't stop with just the zest: I chunked up the orange into little pieces (maybe 3/4 inch, all around) and threw those in toward the end (if I had put in the orange pieces too early, they would have disintegrated, leaving me with a smoother, less stylish sauce).
Ultimately, I think I ended up crafting cranberry relish, rather than sauce, but I was very happy with the results and came home with only a few tablespoons out of several cups that I brought over.

Cornbread Casserole Recipe

1 package Jiffy corn muffin mix
1 egg
1/3 cup milk
1 can creamed corn
1 can whole kernel corn

1. Mix up the corn muffin mix batter in a bowl. Follow the directions on the box!
2. Add the creamed corn and whole kernel corn to the mixture (don't drain, just dump in the whole can, liquid and all)
3. Pour the resulting, super-liquidy batter into a 9"x13" casserole dish (or whatever other size you have available; this recipe doesn't rise very much at all)
4. Bake at 400 F until casserole has set (doesn't wiggle when you shake the dish), about 15-20 minutes.

Ginger-Orange Cranberry Sauce Recipe
recipe courtesy of Ocean Spray bag and Martha Stewart's suggestions

1 12 oz. bag cranberries
1 cup water
1 cup sugar
1 orange, cut into small sections, pith and seeds (duh!) removed
zest from 1 orange
some fresh ginger, grated (make it TINY!)

1. In a large (the taller the sides, the better, because you're exploding cranberries) saucepan, heat water, sugar, and cranberries until boiling.
2. Reduce the heat to a gentle boil and add grated ginger, orange zest, and orange pieces. (Do this at your own pace... you really can't go wrong).
3. Cook until all the cranberries explode and sauce has reached desired consistency, 10-30 minutes, with the sauce thickening as it cooks longer.

Beer Bread Recipe
makes 1 loaf (recipe credit to Farmgirl Fare blog of delight)

3 cups flour (I used 1 cup white all-purpose and 2 cups whole wheat all-purpose)
1 Tbsp. granulated sugar
1 tsp. salt
1 Tbsp. baking powder (unexpired, or else your bread will FAIL)
1 12oz. bottle/can of beer (I used Miller Lite at first, then switched to Trader Joe's Bohemian)

1. Preheat oven to 375 F. Grease just the bottom of a bread pan. (I used an 8"x4" Chicago Metallic one)
2. Combine all dry ingredients in a large bowl (you'll need a great big bowl, because otherwise you'll end up overmixing). Slowly mix in beer just until moist. Don't overmix!
3. Pour the thick batter into the bread pan and smooth the top with a wet spatula.
4. Bake until golden-brown and a toothpick (or chopstick!) inserted into the middle comes out clean, about 45-60 minutes, depending on your stove.
5. Cool in the pan on a rack for 10 minutes, then cool out of the pan on a rack another 10-20 minutes. Don't put it in an airtight package until it's all-the-way cooled.

World AIDS Day Post

Originally posted December 1st, World AIDS Day.

So, I'm a lousy updater.. no surprise. But, today I'm feeling motivated, so I thought I'd make amends. And let you know how important I think World AIDS Day is (even though I try not to let my politics take over the food, AIDS affects everyone).

Let's start with how, once upon a time, I traded food for transportation. Here's the story: I needed a bike for some serious, Los Angeles movement, but I had zero money. So, I posted to Craigslist's barter page "My Baked Goods for Your 20" Bike Frame." And, lo, the responses! The best response was from a lovely man in Eagle Rock who promised a sweet 1980's Japanese bike (along with compliments to this blog!) in return for some grub.
Some negotiation later, I had a slightly-too-large bike without gears in exchange for dinner for the gentleman and his wife. He received: one big bag o' hand-ripped garden salad, one big bag o' sundried tomato-cream sauce penne, one big bag o' cantaloupe/grape/Mandarin orange salad, and one little tray of cheapy peach cobbler.

The bike is a masterpiece and I gained some useful leftover sundried tomatoes to feed to TheBoy when I'm feeling generous. Excellent trade and I look forward to taking advantage of someone else's hunger soon.

What other crazy things have I done with food, you ask. Well, I completely failed to make guacamole. My first time making smushy avocado goodness turned into a complete disaster when I tried to use one ripe and one not-so-ripe fruit. I tried everything from a fork to a shot glass to smash that ornery plant, but nothing worked... so I gave up. That attempt was a waste.
My next attempt, though, pleased TheBoy, a major guacamole fanatic, and one guac-hater. Her opinions have changed! Now, she is a guac-hater with the sole exception of my guacamole-of-intense-pleasure-and-love. Though I posted a recipe for guacamole only a few months ago, I'm going to go ahead and post the actual recipe that I sort of follow to make the guac that disappears at parties. One great idea stemmed from that avocado adventure: serve your guac in the peel to the avocado. Yum and fun!

The resulting sort-of-smushed avocado also made a good omelette filling. Omelettes are great way to use up less-than-perfect leftovers. In fact, we've used not only lousy avocado, but also leftover beef stew (complete with potatoes!), ginger-garlic-mushroom stir fry, and even salad.

Another absurd food adventure? How about the time I made gingerbread cookies from scratch, but couldn't find a rolling pin anywhere... so I made do with a wine bottle? See a future post for details, pictures, and adventure story.


Creamy-Spicy Sundried Tomato Pasta Recipe
Recipe adapted/shamelessly stolen from epicurious.com
  • 1 Tbsp. olive oil
  • 4 large garlic cloves, finely chopped (don't skimp!)
  • 1 cup chopped drained oil-packed sun-dried tomatoes
  • 1 cup whipping cream
  • 1 7.25-ounce jar roasted red peppers, drained, chopped
  • 1/2 - 1 tsp. cayenne pepper
  • 1 cup chopped fresh basil leaves (I cut them with a kitchen scissor instead of a knife)
  • 1 pound penne pasta
  • 1 cup freshly grated Parmesan cheese (you know I used the pre-grated refrigerator stuff)
1. Cook pasta according to package directions. When you drain it, make sure to keep 3/4 cup of the cooking liquid. You'll use it later.
2. While the pasta is cooking, heat the olive oil in a medium saucepan over medium heat. Add the garlic and saute 1-2 minutes, but don't let it burn (totally gross).
2. Add tomatoes, cream, red peppers and crushed red pepper; simmer over medium heat 2 minutes. Stir in 1/2 cup basil and simmer 1 minute longer.
3. Combine the pasta, the delicious cream sauce, the remaining basil, Parmesan cheese, and enough cooking liquid to moisten in a large bowl.
4. Season with salt and pepper to taste; serve and seriously enjoy (or stick it in an bag and trade it for something awesome).

Cheapy Peach Cobbler Recipe
Recipe adapted/shamelessly stolen from recipezaar.com
  • 1 large can sliced peaches, or 6 sliced peaches
  • 1/3 cup + 1 Tbsp. sugar
  • 1 Tbsp. cornstarch
  • 1 tsp. lemon juice
  • 1/2 tsp. ground cinnamon (I used at least 1 tsp., but I'm a cinnamon fanatic)
  • 1 cup flour
  • 1 1/2 tsp. baking powder
  • 1/2 tsp. salt
  • 3 Tbsp. butter (margarine is a fine substitute)
  • 1/2 cup milk (I used vanilla flavored soymilk)

1. Preheat oven to 375 F.
2. In a large saucepan, combine peache, 1/3 cup sugar, cornstarch, lemon juice, and cinnamon. Toss to coat peaches evenly. Over medium heat, bring the mixture to boiling, cooking until the mixture thickens, about 1 minute.
3. Transfer mixture to 8" square baking dish.
4. Make the topping: mix all the rest of the dry ingredients together! Smash in the butter with a fork until the topping is crumbly. Stir in milk just until the topping is moistened.
5. Drop the topping by tablespoonfuls onto the peach mixture and pop that baby in the oven until the topping is golden brown and the filling is bubbly, about 20-25 minutes.


Disappearing Guacamole Recipe
serves 4-6 moderate afficianados or 1-2 really hungry gaucsters (as an appetizer)
  • 2 avocados, smushed by hand (not in a food processor.. break out those muscles!)
  • 1/3-1/2 lime
  • 2-3 Roma tomatoes, chopped (use any kind of tomato you like... but I use Roma)
  • 1/2 medium onion, chopped
  • 1-2 cloves garlic, minced
  • 1/2-1 cup grated cheddar cheese (I have no idea how much I actually use... I grate until I'm tired)
  • salt and pepper to taste

1. Peel the avocados and smash with a fork. Dont' worry about getting the consistency too smooth -- bumps make it extra delightful.
2. Squeeze the lime juice onto the smushed avocados. This step keeps the green guts from turning brown through oxidization. Mix well to coat the avocados.
3. Add all the other ingredients! Stir 'em up and taste frequently (TheBoy bravely suffers through this stage every time). I like to stir using a rubber scraper so I can scrape off every last bit of goodness. Add the salt and pepper last and in small increments -- a little goes a long way.

Wednesday, November 5, 2008

Dinner Out to Lunch In

Asian food is a particular weakness of mine. Eating out is also a favorite. TheBoy similarly enjoys Asian food, so long as it is cooked thoughtfully. Consequently, we try new Asian restaurants pretty frequently. Thus, this post. Here we have some delightful Thai barbecue from the fantastic Original Thai BBQ on Hollywood Blvd. at Western Ave. Being nearby, this was a restaurant we were destined to try -- and, now that we've visited, one we'll likely revisit time and again. TheBoy had their yelp-favorite BBQ pork ribs and I enjoyed the Crispy Duck (pictured). We shared a delightful order of (I think) Combination Soup -- served in a soup tureen over a flame. Awesome! We loved the soup and the leftovers made a great breakfast for the me the next day. Back to the restaurant review, though... I love duck, but I'm pretty picky. This duck was moist without being greasy and had the best accompanying sauce. Verdict: A+ TheBoy loved his ribs and we both really enjoyed the accompanying shrimp-fried rice.
About the restaurant, itself: friendly, helpful service in a pretty nice environment. I didn't take especially careful note of our surroundings, but the place wasn't packed, had great prices, and gave us our food quickly. Another bonus: they didn't use styrofoam (boo, hiss!) to package our leftovers. Instead, they used the semi-compostable Chinese take-out boxes that A) take up less room in the fridge and B) make me feel like less of a chump for not finishing my meal.

Our bento boxes also enjoyed this restaurant. While I neglected to picture TheBoy's leftovers, mine ended up accompanying me in high style. I used leftover shrimp-fried rice and leftover brocolli to form my main carb base and popped in some pre-made stir-fry to give me some protein. I made a big stir-fry Sunday night specifically for our weekday bentos. Definitely something to continue into the future, as our jobs are picking up and we're getting busier and busier. Taking the time out Sunday evening to make a quick stir-fry saved me mucho time throughout the week. Though the stir-fry was my main protein portion in this lunch, I didn't think it was enough protein (being vegan, only the mushrooms actually had any solid protein), so I added some rolled up lunchmeat and a container of peanuts to complement. Frozen grapes and a tiny Hershey bar rounded out this fantastic meal. I was so full midway through this lunch that I couldn't finish and I ended up saving a good portion of the rice to compost later. Despite not finishing the meal, I had enough energy to last me through my entire, grueling 5-hour shift of outdoor canvassing in the Hollywood Hills (I worked as a door-to-door canvasser for a political party... guess which one!).

Another Hollywood restaurant we've been enjoying lately is YenYen at the corner of Sunset and Bronson Ave. This tiny little restaurant hasn't been around very long, so it hasn't gained much popularity yet, but I predict that it will quickly skyrocket in the eating polls due to a whole variety of reasons. Number one is its adorable decor (super chic deep orange-colored walls, sleek tables, long padded bench with throw pillows for some of the seating -- ultra hip). Number two is the delicious food (um.. duh) which is a great combination of Thai and Japanese foods ranging from Pad See Ewe (my first dish eaten there) to Spicy tuna with crispy rice. Number three is the price. Totally reasonable prices for this great place -- great food + affordability = WIN.

The meal pictured here is actually from our second visit when I had some Thai fried rice with chicken. Obviously, we like the place -- otherwise, it wouldn't have gotten a return visit. TheBoy had eaten at work before coming home, so he hadn't been terribly hungry during either of our two visits, so he's stuck to sushi while I had a real meal each time. Despite his small appetite, he's a huge fan of YenYen and we'll be going back sometime when we both need a full, afforable meal.

TheBoy's lunch the next day reflected how much we loved my meal -- leftovers! I even kept one of the cute cucumber slices specifically to adorn this lunch box. I didn't have a lot of time when I made this lunch, so I left the leftovers looking pretty plain and only added color on the right side of the box. Some strawberries and celery made me feel like I was feeding TheBoy healthy food while the (hidden) hummus, cheese, and peanuts added an extra punch of protein. A quick and dirty lunch that was as easy to eat as it was to assemble. Easy, but a win in terms of healthiness and tastiness.

In general, I love using leftovers from eating out to make our lunches. They're easy, but they can pack quite a visual and edible punch. These specific lunches don't exemplify how fun leftovers can be in terms of visual appeal, but they definitely shined as far as the eating was concerned. I look forward to using up more out-overs in the future and sharing them with my lovely audience! Do you have any favorite places to take leftovers from? If so, share them in the comments.

Monday, November 3, 2008

French Onion Soup, and Friends

Once upon a time, a few weeks ago, I made French Onion Soup and forgot to take pictures of the finished product, though I did manage to snap some images of the onion transition from point A, on the left, to point B, on the right.

I'm not really a big fan of French Onion Soup, really, but TheBoy and TheUpstairsNeighbor are, so I thought I'd "sacrifice" for their sake and have a lovely evening with the two of them. Instead, I found a new love for cooked onions and instilled in my loved ones a new respect for my cooking skillz. See the bottom of the post for the remarkably easy recipe.

Alongside newfound respect, this recipe also produced leftovers to feed to TheBoy. Instead of trying to slop soup into a regular bento box, I used a thermal jar (OK, a Campbell's soup thermos that I stole from my mother's pantry) to hold the soup and packed a normally too-small bento accompaniment. I didn't really need to use the thermos for the soup -- I could've used an uninsulated container -- but it was exactly the right size and it's cute, compact, and, best of all, leak-proof. Why didn't I need the thermal capacities? Several reasons:
  • I pack lunches at night and refrigerate all the food for safety. Refrigerating thermoses is both counter-intuitive and not food safe (because the thermos doesn't keep the food hot enough to be safe, but it does insulate it enough from the fridge to keep it from getting cold enough for safety).
  • We don't have a microwave! So, heating up the soup in the morning would've been a challenge of stove-heating soup in a pot while it's still to early to see clearly.
  • TheBoy has microwave access at work and a glass bowl that lives in the cupboard at work for just such occasions that he should have to heat up some lunch.
To accompany this thermos, I sent TheBoy a smallish bento filled with soup-appropriate needs. This bento features some toast to float on the soup, peanuts for added protein, and a tortilla filled with hummus and a lovely assortment of whatever veggies we had on hand (probably sliced tomatoes, cucumbers, and lettuce). Acting as gap-fillers are a steamed jalapeno (leftover from a taco truck dinner!), a dried mango slice, one mini vegan brownie, and grapes and strawberries. Surprisingly, this lunch ended up as a vegan meal for TheBoy, though it ideally would have contained some cheese to sprinkle on the soup. TheBoy is not at all interested in vegetarianism or veganism, but I sometimes spring lunches like this on him... without any complaints. Overall, a big win and he requested an immediate repeat, though I think he may have to wait until I have the motivation to chop up half-a-dozen onions again.

French Onion Soup Recipe
adapted from Simply Recipes

  • 6 large red onions, peeled and thinly sliced.
  • Olive oil
  • 1/4 teaspoon of sugar (or just some, like I did)
  • 2 cloves garlic, minced
  • 8 cups of broth (I made vegetable broth using better than bouillon paste)
  • 1/2 cup of white wine (I used white wine that we would drink... so should you!)
  • Salt and pepper
  • Spices (I used Basil and "Italian Seasonings, though the original recipe calls for Thyme and a Bay Leaf... I'm poor and can't afford to by spices just for ocassional use)
  • 8 slices of toasted bread (French bread is canon, but we had wheat on-hand)
  • 1 1/2 cups of grated Mozzarella cheese with a little Parmesan (Gruyere is the standard, but, again, poor! and Mozzarella is fine, anyway)
1. In a large pan, sauté the onions in the olive oil on medium high heat until well browned, but not burned, about 30 minutes. Add the sugar about 10 minutes into the process to help with the carmelization.

2. Add garlic and sauté for 1 minute. Add the stock, wine, and spices. Cover partially and simmer until the flavors are well blended, about 30 minutes. Season to taste with salt and pepper.

3. Ladle the soup into serving bowls (if you have oven-proof bowls, like Corelle, as I have. If not, use an oven-safe casserole dish). Cover with the toast and sprinkle with cheese. Put into the broiler for 10 minutes at 350 degrees F, or until the cheese bubbles and is slightly browned. Serve immediately.

Serves 4-6.

Sunday, October 26, 2008

Itty Bitty Bentos

Sometimes, we don't need full meals, but aren't comfortable leaving the house empty-handed. In the past month, I've taken pictures of two instances of itty bitty bentos: 1. my first far away job interview (1.5 hour bus ride, each way even though the location was only 15 miles away) and 2. a trip down to Orange County to visit TheBoy's parents (1.5 hour drive on a small breakfast). The main reason we take snacks with us is because I get very cranky (to put it mildly) when I get hungry. Because I eat every two or three hours, I get hungry pretty quickly, but a small snack will set me to rights again in no time. So, small snacks/meals are really useful for us.
Situation 1, the interview, called for a fairly large snack, since I left too late to have time for a decent breakfast. I started with what we had on hand: tortillas. I spread some homemade hummus on the tortilla and filled it with sliced cucumbers, lettuce, and cheddar cheese. I had to cut the tortilla in half to make it fit in the little box, but that just made the meal easier to eat and made plenty of space for some yummy, colorful gap fillers out of cheery cherry tomatoes. This box is actually a child's bento box -- holding about 450 mL, translated to about 450 calories, with correct packing technique.
The second layer of this bento holds an assortment of snacks: babybel cheese (we bought a bag of 28 for $10 at CostCo... WIN), chili-lime almonds, salted peanuts, red grapes, and a small container of raisins and crasisin. This was a wonderful snack and made me calm and sweet for my interview. The other passengers on the bus looked at me a little funny when I pulled out a tiny burrito while headed toward Compton from Hollywood, but I'm pretty sure I don't mind the looks.

Situation 2, the long drive, had me and TheBoy ready for snacks. So, I made a very simple, very SoCal cheese and grape box. We used a little pink snack box to hold portions of chopped dry jack (best cheese, ever... dry and cheesy and ...just try it). TheBoy was driving and the bite size pieces made the delicious (and fairly pricey) cheese go further and made them very easy for him to eat while still concentrating on the road. The tiny chunks also went perfectly with the grapes -- we just ate a piece of cheese with a single grape... and it was so great! Combined with a great big Nalgene full of water, we had a fairly filling, healthy snack to entertain us all the way to the OC.